When I wrote about Interior Doors (Step 28), I mentioned that each part of the pre-hung door has a purpose and these pieces are not just about aesthetics. Interior trim is similar since there's most times a reason behind the moulding or decorative millwork. These fine carpentry pieces were originally sealing up gaps and serving as transitional components of a home where one building material was meeting up with another - for example where brick or plaster met up with wood. Today, when we see an unaddressed cavity inside an interior living space we recognize it as something that doesn't look good or complete, but the generations that came before us were also installing their small pieces of wood to keep bugs, other small critters, and drafty cold air outside. I'm not saying they weren't mindful of how things looked, but they didn't weather proof, insulate, and take the same pest control measures as us and interior trim did more in the past then simply close up a gap between two different types of materials.
Also, I will point out that some of our nation's oldest, finest homes had experienced shipbuilders on their crews. I have an opinion that these skilled tradesmen were sometimes just showing off, that some of these charming details caught on and became trendy, and I will speculate that more than a few of our interior trim preferences are rooted in influences past down to us from the homebuilders of our ancestors.
Keeping some of this in the back of your mind will help in completing this phase of the renovation or construction.
Step 29 is the time to install base to trim out the gap where the walls and the floors meet. With the exception of rooms with carpet (and areas with wood flooring that needs to be sanded and finished) this is also the time to install quarter round or shoe moulding.
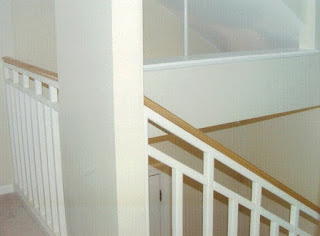
As I've said before I like to open things up and Step 29 is when these openings get trimmed out with a wooden sill, the skirting underneath that looks like the trim under the windows, and that's needed. Interior handrails should also be installed at this stage of the interior work.
Also, I will point out that some of our nation's oldest, finest homes had experienced shipbuilders on their crews. I have an opinion that these skilled tradesmen were sometimes just showing off, that some of these charming details caught on and became trendy, and I will speculate that more than a few of our interior trim preferences are rooted in influences past down to us from the homebuilders of our ancestors.
Keeping some of this in the back of your mind will help in completing this phase of the renovation or construction.
Without giving too much more of a history lesson on interior trim, I'll use chair or dado rail as an example of how some interior trim originally had a purpose. As the name suggests it's initial intent was connected to chairs since it used to be installed to protect walls from being damaged. However, most homeowners don't consider that and simply like how it looks. So, as I mentioned above, interior trim doesn't always serve a purpose, but there's typically a underlying reason beyond appearance and chair rail is a perfect example.
Casing around doors is typically done with Step 28, but this is the phase to complete any unfinished trim at doors, install window sills, any necessary casing around the windows, and the skirting that trims out the area under the sill.
It's not uncommon for DIYers to install some trim like wainscoting and crown moulding after moving in, but if these are being installed with the rest of the interior trim during the construction of a new home or a rehab, it should be installed after cabinets, counters, and doors and before the caulking and painting.
Interior trim ties everything together and makes it look complete, but don't be surprised if it doesn't look correct and sharp until after the caulking and painting (Step 30) is done.


No comments:
Post a Comment